Tutorial: A Shadertoy-like Program
Shadertoy is a website dedicated to shader-only programs. It is well worth checking out what you can do with just a fragment shader.
Let us write a fragment shader viewer in Dent. We’ll go about it in four short stages.
Stage 0: Planning
Before diving in, lets plan what we need.
We want to just run a fragment shader. But to render that we need some geometry on which to execute it. We can just use a rectangle that fills up the whole screen (Dent has us covered here so we don’t have to mess with any vertex data etc.).
We’ll have a vertex shader that is as simple as can be, and then we can do magic in the fragment shader.
Stage 1: Getting a Game Running
We can use the dent script dent-init to set up our game. Simply run:
$ dent-init tutorial
in order to make a minimal game tree.
Lets take a look at what’s been done. We now see a directory called tutorial
under which all our code and assets etc will go.
The entrypoint to our game (ie the file we’ll run) is called tutorial. We
don’t need to do any setup before the game runs, so this file just has a single
import statement. Dent is unusual (underdeveloped) in that the game begins when
you import that module. This is earmarked to be changed in the near future.
Every game needs a scene, and we have a dummy one, scenes/MainScene.py:
from dent.Scene import Scene

class MainScene(Scene):
  pass
The file scenes/__init__.py does some python and dent housekeeping. It is
unimportant at the moment
Running the tutorial file should present you with a blank scene. Mmmm.
Progress!
Stage 2: Writing a Shader
To go much further we are going to need a shader. You can look at the Shaders docs in order to get more detail as to how shaders are handled in Dent, but for now we will need a vertex shader and a fragment shader. The fragment shader will eventually hold all your ray-tracing/edge-detecting/awesome drawing code, but to start with can be very simple.
Make a new directory, shaders/main and in it add fragment.shd:
#version 400
out vec4 fragColor;
in vec2 pos;

void main()
{
  fragColor = vec4(
    (pos.x + 1) / 2,
    (pos.y + 1) / 2,
    cos(pos.y * 3 + pos.x * 8) / 2 + 1,
    1);
}
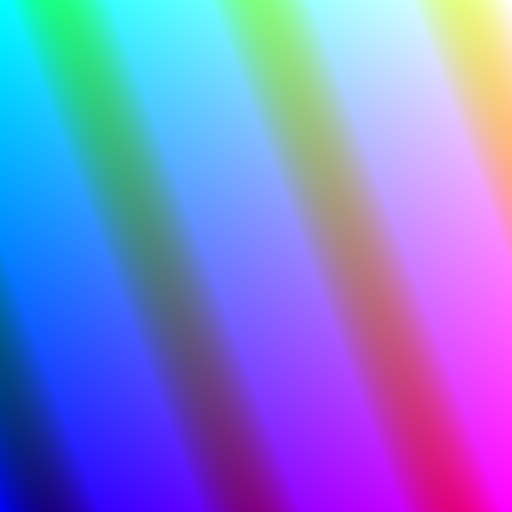
Here we are expecting an input of pos from the vertex shader and will give
an output called fragColor. We are just setting the color to be a set of
diagonal stripes (as we shall see).
Then create the vertex shader, vertex.shd. The vertex shader will be getting
input from Dent, so its input needs to be appropriately named. Dent can provide
shaders will all manner of inputs: positions, normals, model matrices and more.
However, for this tutorial, we only need the position of the geometry:
#version 400
in vec3 position;
out vec2 pos;

void main()
{
  gl_Position = vec4(position, 1);
  pos = position.xy;
}
Here we have assumed that the position passed to the shader is in screen space: that is, it needs no model matrix nor view matrix. This will turn out to be a good assumption.
Note, if you are unfamiliar with GLSL, that pos is a variable passed from the vertex shader to the fragment shader and position is a variable passed to the GPU from the geometry of the object being rendered.
Stage 3: Using the Shader
To actually use the shader we need geometry. We want a quad that will fill up
the entire screen. Thus we will need four points at positions (-1, -1),
(-1, 1), (1, 1) and (1, -1). We will also want two triangles. If you
know about geometry culling, then you will know that these triangles will need
to “face” the right way. We’ll then need to send this geometry to the GPU and
bind the correct vertex attributes to the shader.
Or rather, Dent will have to do all of that. Because rendering rectangles is a common task (think minimaps, icons and text), and that is what engines are for, we will delegate that task to it.
Dent defines a RectangleObject that does just
this. By default it creates a square from (-1, -1) to (1, 1) just as we
need. When constructing it, we pass it the name of the shader that it should use
to render. Since we put our earlier shader in shaders/main, this will be the
string “main”.
Hence the change to the scene is quite minimal. We also define a display
function that is called to refresh the screen:
from dent.RectangleObjects import RectangleObject

class MainScene(Scene):
  def __init__(self):
    ...
    self.object = RectangleObject('main')

  def display(self, **kwargs):
    self.object.display()
All things being well, running the game should give us:
Stage the last: Afterword
At this point we can leave the Python (and Dent) code and focus on our shader. As mentioned before, there is a lot one can do with just a fragment shader. For ideas, check out the Shadertoy gallery.
However, at some point you will probably want to give your shader an image to
work with. In GLSL, this is called a sampler. Using Dent to do this is a
little rough at the moment, but simply add the following to the __init__
function of your scene:
def __init__(self):
  ...
  self.texture = dent.Texture.Texture(dent.Texture.COLORMAP)
  self.object.shader['colormap'] = dent.Texture.COLORMAP_NUM
  self.texture.loadFromImage('imagefile.png')
  self.texture.load()
Then you can use the texture in the shader as a uniform sampler2D called
colormap.